Showing posts with label DIY. Show all posts

Tuesday, April 9, 2013

Malachite and Marble Floors Sneak Peak.

Those of you who follow me on Instagram (@atlsdesign) have seen the progress of the painted floors in my office.  Inspired by Kelly Wearstler and her mesmerizing take on patterned floors, I took to transforming old wood floors into a malachite and marble masterpiece.


After grossly underestimating the magnitude of said project, cuss words were flying along with a few threats of scrapping this project all together.  But a glimmer of hope remained and I pushed through the grueling process of taping and faux finishing row by row, "tile" after "tile".  Admittedly, some boxes are better than others, but over all I love the results.  It's spunky, yet classic.  Colorful, yet sophisticated.


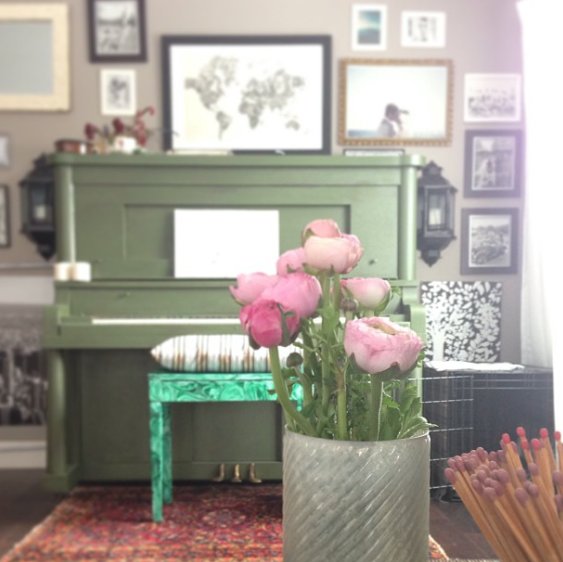
Can't wait to share my entire studio after it's properly shot in a week or two.  And for those of you who stopped by from Little Green Notebook, thanks!  I'm glad to have you :)  You can find more on my malachite piano bench and green piano here.   And one more recent shot of the piano I just love.

Friday, November 16, 2012

DIY Chalkboard Makeover.


A $7 estate sale investment got the royal chalk paint treatment 
(frame and all).  


Added bonus: the frame acts as a tray for favorite photos and chalk- 
helping us stay organized and pretty.   

Happy weekend everyone!  Hope it's warm and cozy.   

Wednesday, October 3, 2012

Our Painted Piano and DIY Malachite Bench.

If our piano growing up was peach or lemon yellow I bet I would have practiced a lot more.


Before, a sad empty living room corner.  


And the movers bringing in what they lovingly referred to as "the heaviest piano ever."  I joke. 


I found this beauty on Craigslist for next to nothing.  She was worse for wear when I found her, but nothing some green paint couldn't fix. 


Even though there was no doubt I'd be painting the piano, this decision was solidified once we got her in the space.  This finish just didn't do her justice.  #lifeistooshortforabrownpiano   


As for the bench, it sat in its original state for quite some time.  I finally decided a monochrome, green-on-green look would be fun and decided to make things interesting with this faux malachite technique I'd been dying to try.  It was so easy and instantly gratifying!  Such a fun way to inject some pattern to the otherwise solid piano.  I would definitely recommend this DIY.


I think this is really a lesson in living with what you love.  By no means am I a technical player, so for us painting the piano wasn't terrible from a sound / quality standpoint (I'm sure some of you serious musicians out there cringe at the sight of our painted instrument).  But we really love it.  This little corner of our house brings me such joy now, whether the piano is being played or just sitting silent.  And I'm such a proponent for a happy home!  So I say if you want to paint you piano (or do malachite walls or paint your ceiling blue or layer a rug on a rug on a rug) do it!  You won't regret it, I promise.  


Wednesday, February 15, 2012

DIY Fabric Roller Blinds.


How great is this project? Colleen whipped up these beauties and it seems too easy to be true. My curtainless windows are crying out to be covered, and this is a great alternative to stationary roman shades (what I was planning for a few of the windows).

PS Don't ever get me started on the gorgeousness that is that fabric ("Mulberry Plantation" from Brunschwig & Fils)! Such a beauty.

Friday, October 21, 2011

DIY Bar Cart.

After yesterday's post, I was alerted of a great DIY. Look at this amazing transformation Kendall performed to turn an old AV cart (hello 4th grade flashback!!) into a stylish and trendy bar cart.

Before

Old, gunky, and rusty

And the big reveal...


I know! I'm thinking the same thing!
That used to be an AV cart that looked like it was on its last leg?!
The girl's good.

The styling is impeccable and the designer in me cannot resist commenting on the yummy curtains and dark stained floors in the background.

Check out Kendall's blog here and see the process from start to finish.


Happy Friday everyone!
Kendall, with a bar cart that beautiful, I'm just waiting for my invite for drinks!

Friday, June 3, 2011

What A Great Idea.

Happy weekend everyone! Sorry for the spotty posting lately. I've been busy, busy, busy over here with lots of fun projects, and one especially exciting endeavor I can't wait to share here on ATLS. Today I wanted to share a few fun and simple DIY projects I've come across lately.

A creative way to display lots of your own little artists' work- via Pinterest

Ask your local grocer for a pallet or two for a simple (and free) headboard- via Stylizimo

Such a sweet reminder of all the fun places you and your Hunny have traveled to.
And what a creative wedding gift for a dear friend- via Life Blessons

Paint the back of your cabinets for a pop of color in an otherwise white kitchen- via Pinterest

Spell out any word you want with custom created letter pillows- via Etsy

Perfect for kiddos still afraid of the dark. What's more fun than a "night light headboard"? - via Pinterest

Braided summer headbands...Total swoon! via- Pinterest

So onboard with this beautiful, affordable, and environmentally friendly centerpiece via- Luna and Chloe Weddings

So many fun ideas, so little time! If anyone attempts one of these projects, send photos. I'd love to see your result!

Thursday, March 31, 2011

March Madness Recap.

March was a busy one for sure. With so many fun reveals, the month flew by. I'd love to take a second to look back at a few of my favorite projects and remember all the fun of March Madness.


Thank you readers, new and old, for stopping by everyday! You make this blog what it is! Fun, stylish, and a little escape each and everyday. See you tomorrow!


Thursday, March 10, 2011

DIY Padded Headboard Tutorial and One of my Favorite People.


I knew I wanted a padded headboard for my bedroom, and I knew DIY was the only way I could get one with prices (for even a twin!) way out of my league. I also had been lusting over curvy headboards and decided that's what I had to have.

So when I realized I unfortunately didn't have the necessary tools for this project, I called my Uncle Jay- not only the funniest person I know but also a very talented carpenter and skilled woodworker. He picked up the wood (SurePly- something I never would have thought about using but now would highly recommend) and I came over ready to learn.

He taught me tons of tips and tricks regarding the Jigsaw:

*Take it slow to ensure a perfect cut around tricky curves.

*Don't start the saw directly along the line you intend to cut, but rather cut into another edge of the wood and move into your line to prevent splintering.

*Also, hold the wood down to prevent it from rocking and splintering.

I only wish I had chosen a more intricate curve after I realized how manageable working with the jigsaw was.

TUTORIAL

Materials:

Sureply or a thin piece of wood the width of your bed, Jigsaw, staple gun, staples, twin size "egg carton" mattress pad, fabric, craft paper
(***Note*** Big box home improvement stores offer tools for rent. Smaller hardware stores don't always offer this option, but they should be able to recommend a tool rental shop incase you don't have an Uncle Jay.)

Directions:

1. Draw the design of your headboard onto craft paper. I folded my piece in half to ensure the curve would be symmetrical on each side since I freehanded the design.
2. Cut out the curve and trace in onto your wood. I determined the height I wanted and measured from the bottom of the wood. One less edge to cut.
3. Cut out the design using a jigsaw. Getting the saw started on the wood is the most challenging part. Once you have the blade in, it's smooth sailing!
4. Sand around the edges to smooth rough areas.

5. Lay your mattress pad with the carton side up. You want the smooth side to face out so your padded headboard doesn't have a funky bumpy texture.
6. Lay your wood down on top of the pad. Start on one side and wrap the pad around the wood. Staple somewhere in the middle of that side and move over to the opposite side.
7. Stretch the pad so it's pulled taut and staple somewhere in the middle of that side.
8. Now work your way around until you have the pad stapled to the wood all the way around. Depending on the curve you choose, you'll have to play around with the pad and make sure you have it stapled smoothly all around each curve. The curvy side takes longer, but take your time and make sure you smooth it out all around. It will be worth it in the end.

9. Now lay out your fabric, good side facing down on the ground. Place your wood/ pad board face down on top of the fabric.

10. Repeat the process you did for stapling the pad. Start on the middle of one side and place a staple. Then move over to the opposite side, pull the fabric taut (I did this solo, but two sets of hands and muscles would be useful) and staple. Again, the sides aren't too challenging, but it gets tricky once you get to the dips in the curve.

11. To install, I used a drill and screwed one screw on each side at the bottom (so it's below the level of the bed). That combined with the bed pushed up against the headboard stabilizes it. You may want to install yours more securely, but I was trying to create as few holes as possible as I'm renting.

Sorry guys. I wasn't very good about photographing the steps of this project. It's really an easy project, just takes a bit of time. I would encourage you to take a risk and get creative with your shape. There are such lovely examples out there for inspiration. The sky is really the limit.

Check back tomorrow for pictures of the headboard in my bedroom. I looooveee the way it turned out and get so many compliments on the headboard when I have guests over. Hope this tutorial helps and gives you the courage to take on the power tools ladies! I'd love to see pictures of your work if you try your hands at this project! Send them to me at heidi.atlsdesign@gmail.com!

And one last thing, don't forget to enter the Giveaway..... Holy Long Post!

Monday, February 7, 2011

Silhouette Pillow.

Massucco Warner Miller Interior Design now sells both custom and standard silhouette pillows on their site. And they're absolutely amazing! The burlap and canary combo is a personal favorite, but really the options are endless.

This got me thinking about a fun little DIY option. Spice up an old pillow by adding a felt silhouette in a fun color. Simply create a silhouette on paper (or find an anonymous one online), trace it onto fabric, cut it out and use fabric glue to attach the silhouette. And in an hour you've got a brand new pillow!

P.S Any readers who get bit by the DIY bug and try this project, send pics to my email at heidi.atlsdesign@gmail.com. I'd love to see your work!

Wednesday, February 2, 2011

DIY Skirted Sink Tutorial.

Making this skirt was very simple and I would recommend the project to even beginner DIYers. It simply takes careful measuring and a few hours, and in no time your ugly plumbing is concealed. Well worth it in my mind.

Materials


Directions

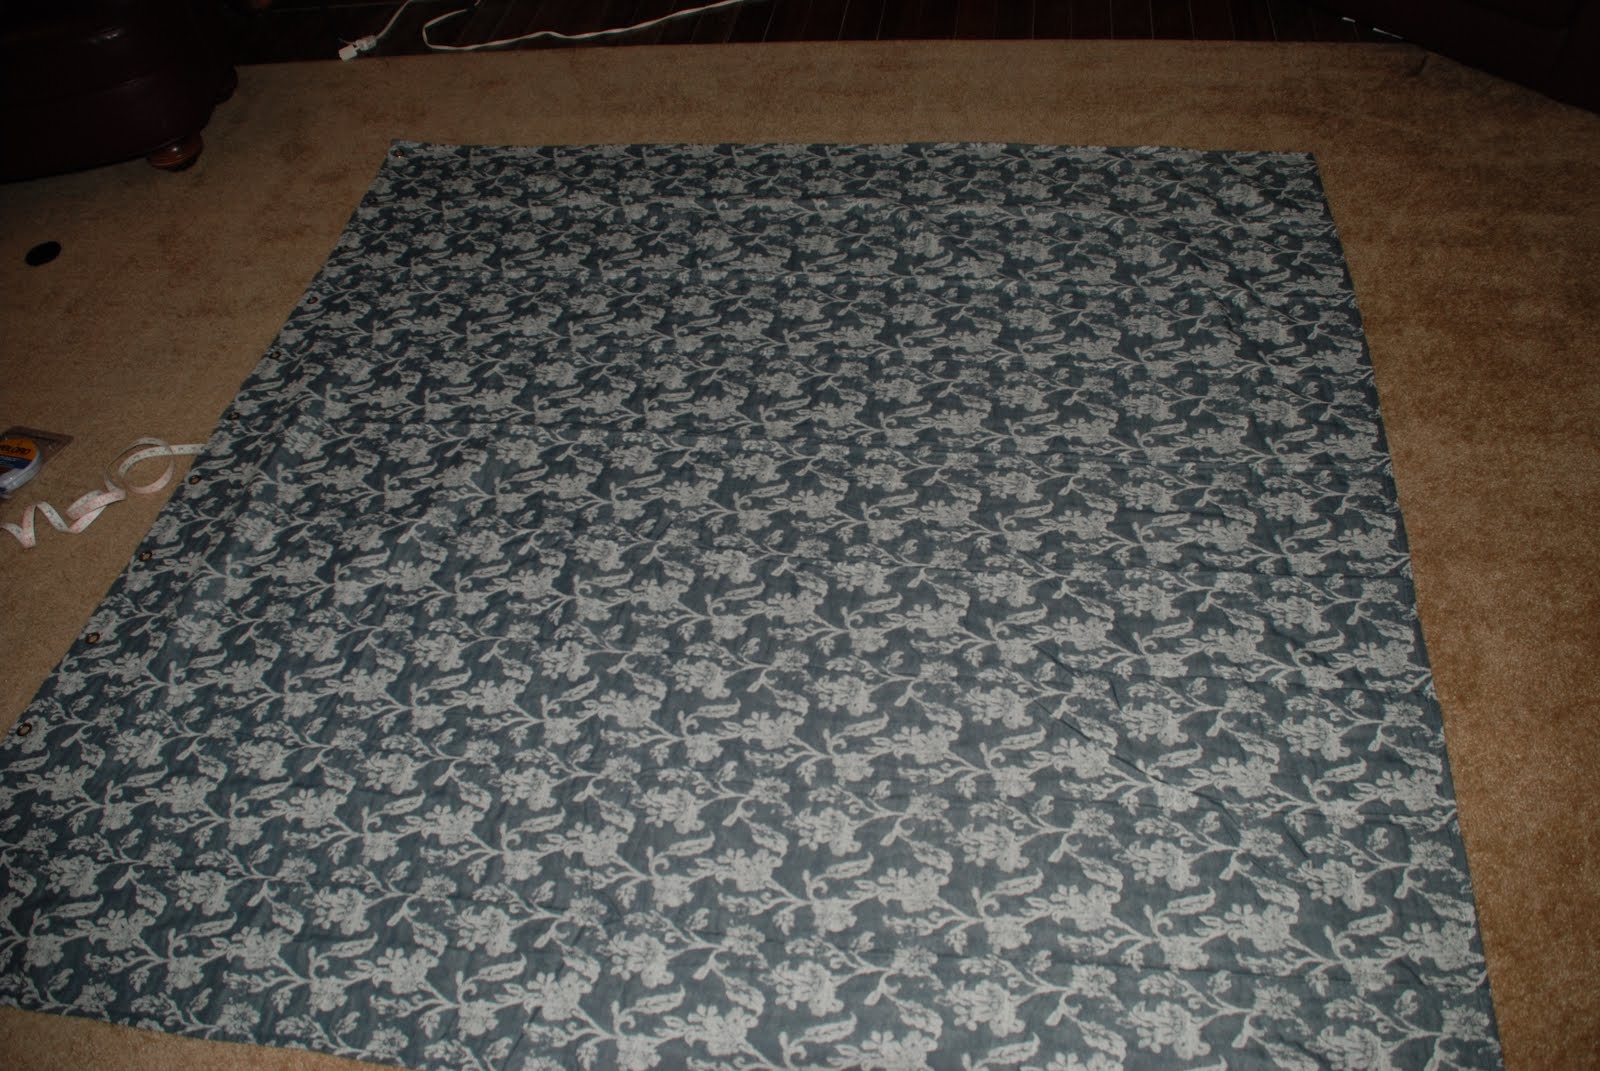
1. I started with a cloth shower curtain I found in the clearance section at Target. At $9.99, you can't beat that. I laid it out flat on the ground and quickly ironed out any obvious kinks.


2. Measure the height of your sink. Add about two inches to that number and cut the large shower curtain down to that size. I measured from the bottom of the curtain up, so I already had a finished edge which resulted in one less edge I would have to turn under. Also, the shower curtain I used had metal grommets along the top that I did not want to use for my skirt. If all your edges are raw, you'll want to add two inches to each edge that will need to be finished.


3. My sink had three sides, and therefore required three panels. Measure the length of one side. Add 4 inches to that number and cut your fabric to size. Next, I used Stitch Witchery to turn the edges under. It's so simple. Cut a piece of Stitch Witchery the same length as your edge, fold the fabric over, place a damp cloth on top of the edge, and iron for 10 seconds. You want the iron to rest for ten seconds on one section before moving down your edge.

Here is what one finished panel will look like.


4. I ran a line of sticky back velcro along the top edge of the panel, removed the paper, and stuck the panel to the sink, making sure the top ran evenly flush across the top of the sink.


5. Repeat these steps for all sides of your sink. Once I was done with the large panels and had placed them on the sink, I realized there were small areas where the panels did not meet up. So to finish the skirt, I took strips of left over fabric (about five inches wide) and placed one small panel under the corner where the front and side panels come together on each side. This really finished the look and only took a few seconds. The edges on these panels don't need to be finished because they are under the other panels. I adhered them to the sink with the same sticky back velcro is used for the main panels.

6. Admire your work!


Pieces of Advice:
I used a shower curtain because it was cost effective. Also it is made to be around water so I figured it would work perfectly for the area below a sink and ward off drips of water.

You can use the same technique to skirt a table, desk, etc. Sky's the limit here!
Related Posts Plugin for WordPress, Blogger...