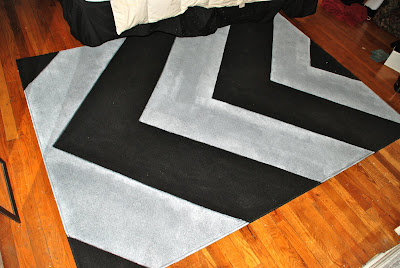
Confession 2: You know those experiences in life that are hard and great and you're glad you did once, but you hope you never have to do again. This project goes into that category. With that said, I really love the result. Even a small chevron rug would not be possible with my current budget. And now I have a 7' X 10' beauty for my bedroom!
Start with a plain black rug.
I used two of these from WalMart. I found them around college move-in time on big time sale. I paid $25 for both of them! I haven't seen them this cheap since.
Next create a triangle template.
To do this, (1) I created a rectangle as wide as the rug (for me 60") and about half as tall (26" for my rug). Then I folded the rectangle in half (2) and created a line diagonally across. Finally, I cut along the line and ended up with my triangle template (3).

Trace your chevron lines onto the rug.
I laid the triangle along the bottom edge of the rug. With a piece of white chalk, I traced the zig zag. Next, I measured 18" up on both the left side and right side of the rug (to ensure a straight line across) and moved the template up and retraced the zigzag. Continue this until you have completed the whole rug.


Tape the lines.
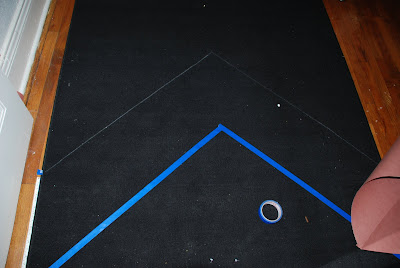
Using the white chalk, I first put a "W" in the lines that would be painted white so I didn't get confused. Then I used painters tape to section off the lines. ***To avoid the same mistakes I made, use duct tape instead. For rug #2 I used duct tape instead and was a much happier girl during the painting portion. The tape actually stayed on the rug and I wasn't constantly re-alligning the tape and nervous that paint would get under the not-so-secure tape. This made the project a lot more enjoyable and
manageable!***
Make sure you put the tape on the black side of the chalk lines to ensure even chevron stripes throughout the rug.


Paint the white stripes.
I used regular white wall paint. I added a little bit of water, about 5 parts paint to 1 part water, and stirred well. Using a sponge roller,


Remove tape, let dry, and marvel at the beauty that some patience and hard work can create.
I let the rugs dry overnight and they were dry midway into the next day. Drying time will vary depending on the amount of coats you apply.


I still need to put the rugs together and install them in my bedroom. Cannot wait to see the completely finished affect in my bedroom, but I know it will be great. More pictures to follow soon!
Hopefully my insider tips will make this project a lot easier to tackle. Be brave and try this project yourself. Trust me, it's soooo worth it!


No comments:
Post a Comment